
Most of you have probably already noticed I've been stamping with bubblewrap lately and I really like the unique result you can come up with. I decided to give you some simple basic instructions on how easy this is to do and maybe some of you will try it.
First I choose the papers I'm going to work with, then choose the background cardstock and a coordinating color of paint. I cut off a piece of the bubble wrap and with a foam brush lightly brush all over with the paint. Kind of do this quickly as it dries quickly on the plastic. Then, quickly press the painted bubblewrap onto the cardstock and then lift it up. If you are like me you like to have an uneven amount of paint left on the cardstock. Really gives it kind of a distressed look. When, it's all dry in usually 30 minutes or less you can go ahead with the rest of your page as usual.
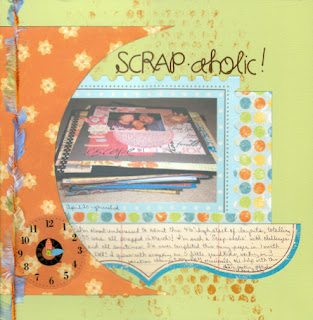
On the layout, "Scrap-aholic" I've used it as part of my background. And, on the layout, "Miracles" I've used it as a bottom border.
Here are a couple examples I've come up with and I really like this technique and will be using it more in the future. Hope to see what you can do with it too!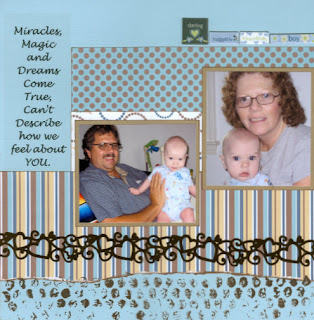
Here are a couple examples I've come up with and I really like this technique and will be using it more in the future. Hope to see what you can do with it too!


2 comments:
These are wonderful examples. Thanks for reminding us how simple things around our house can help us with our scrapbooking
super fun technique that i want to try...thanks for the reminder...now where is that darn bubble wrap downstairs!?
Post a Comment